Basic User Guide µ-XRF
Bruker M4 Basic User Guide
This guide is aimed at teaching a user about basic instrument use. Turning on the instrument, exchanging samples, and carrying out a basic point analysis run on the Bruker M4. It is not a compressive breakdown on specific topics they may be touched on in this guide.
Please note:
The instrumentation/equipment I talk about in these training blogs is purely what I have access to. There is no financial support or promotion from various companies that I mention.
Also, the procedures I discuss are equipment specific and furthermore laboratory specific. Each lab around the world will run their instrument slightly different, so always get in contact with the technical staff member who runs the instrument that you are interested in to find out how to get access and get trained.
The Bruker M4
Looking at the front of the spectrometer we have the chamber door which has M4 Tornado and the Bruker logo printed on the door panel. Below that you will see a key and a row of buttons and lights. Starting from left to right these are:

The safety key, the green start button, the Instrument status lights, and the emergency stop. Under the status lights at the bottom, it the open and close button for the chamber door. The status lights are a quick way to let us know what the instrument is doing. In the above image we know that the spectrometer is on, the chamber is at atmosphere, the door is locked, the X-ray source is on, and the shutter is open. Operating the spectrometer is carried out through the M4 software on the PC.
Starting the M4 Tornado
To start the Bruker M4 make sure that the emergency stop button is not triggered. Turn the safety key to the on position, then press the green on button. You will hear the instrument start up followed by a set of beeps. Then start your PC, once you are logged in click on the Bruker M4 icon, it will ask you for a username and password (talk to your technical officer about this) and click “Login”.
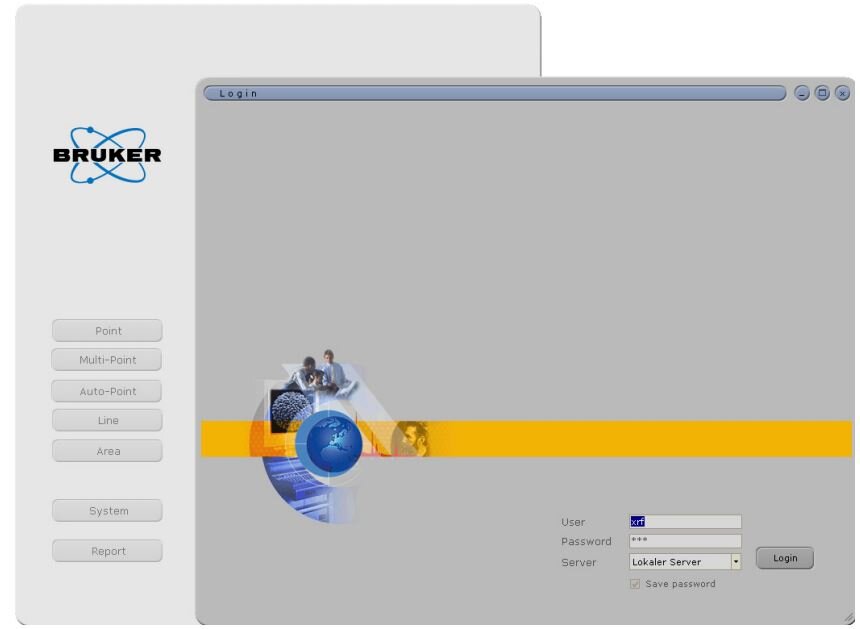
If everything is working and connected properly the instrument will connect to the PC and you will be able to navigate around the GUI.

The M4 software has several operating modes, at the top of the software you will see these options, we will go through each of these areas in detail in future posts.
Point = take a single analysis
Multipoint = set up multiple point analyses
Auto point = set up routine point analyses (excellent for samples which are identical e.g., electronic parts)
Line = conduct a line scan
Area = create elemental X-ray maps
Xmethod = make your own calibration methods
System = calibrate and set up your spectrometers and system components
Report = set up a report documentation for your analyses
Sample Exchange
Point mode is where I direct all new users, when loading and unloading samples, regardless of the analysis mode that they want to work in. This is because you have access to two camera monitors. Each monitor can be set to 10x magnification, 100x magnification, overview (chamber view) or mosaic. I recommend having one camera view set to 10x magnification and the other set to overview so you can see your sample and the stage from two points of view inside the chamber.
Check the vacuum state bar which will be either green (under vacuum) or red (at atmosphere) to turn the vacuum on/off simply click the “Vacuum” button in the GUI. When the button is blue the vacuum pump is on if the vacuum button is grey then it is off. Wait till the vacuum cycle has finished to avoid damaging the instrument.

Once the sample is at atmosphere you can open the chamber by clicking on the eject button or by simply pressing the door button on the instrument or in the software. Make sure you are ready to exchange your samples to avoid the door being open to long, this minimises dust and contamination getting into the instrument.
Place or remove your samples on the stage, within the analysis area which is marked by the dotted grooves on the stage. Make sure your samples are physically stable and the part or area you want to study is parallel with the roof of the spectrometer. You may need to use specific sample holders or sample preparation methods so have a discussion with your instrument scientist before you start your work. Also, make sure that your samples are of similar height and dimensions to avoid collisions inside the chamber.
Close the chamber door, either through the software or the button on the front of the instrument. Once the door has closed if vacuum is required (analysis can be conducted without vacuum) then activate to get the instrument to pump down. Note it is possible to run the Vacuum in two ways, by allowing the pump to reach its maximum vacuum state or by clicking on the carrot drop down and selecting the variable mode which allows you to set a pressure e.g., 300 mbar. The ability to set a vacuum pressure is helpful to handle sensitive samples, biological samples or any sample that may be affected by vacuum.

Turn on X-ray source
Turn on the X-ray source by clicking the X-ray icon in the software. the button will turn yellow, and the source will start to power up to 50kV and 200 µA.

You can adjust the settings of the source by clicking on the dropdown carrot button next to X-ray tube 1 in the Devices menu. Here you set your excitation voltage, current as well as the use of filters. In this example we will simply operate the instrument at 50 kV and 200 µA.

Focus Sample

Once the source has reached the right settings and the vacuum has stabilised, click the “load button” when you do this the stage will move to the centre/ load position of the instrument. However, your samples will be out of focus and far away from the source and the detectors. To move your sample into view of the source and the detectors you will need to use the functions located next to the top Camera view. Click on “move Z stage position” the button will glow, now when you click and drag on the camera window the stage will move up or down based on the direction you move, the closer to the centre of the image the stage will move slower and the further away from canter the stage will move faster.

If you move to fast and hit the stage limit centre (the black shaped cone in the centre of the instrument the stage will lock, and the stage status will go from green to red.
If this does happen, click on the dropdown carrot button next to the stage status, double click on reference Z. The stage will unlock and move to the reference position located at the bottom of the chamber.
You can also click on the move stage button, once again this function works by clicking and dragging on the camera window in the desired direction of travel. The distance from the canter will determine how fast the stage will move in X and Y.
Move and focus on a sample using the 10x magnification camera, once you have achieved a good focus, do a fine focus using the 100x magnification camera. In this example we have focused on a piece of manganese metal, as we will use this to calibrate the energy positions of our spectrometers (you could also use copper metal too).
Calibrate the spectrometers
The following should be done with the assistance of the instrument scientist.
At the top of the GUI, you will see the mode “system” click on this mode. Then click on spectrometers in this screen you can test and/or calibrate the spectrometers.

Click on the metal standard, in this case Mn. then click on one of the spectrometers so it highlighted. Click on the test button, here you will see the information on the accuracy and resolution of the energy dispersive spectrum. If the deviation is too far from 0 it is recommended that you calibrate the detector. You can choose to calibrate using course medium or fine. Click on fine then click calibrate. Wait for the system to calibrate the spectrometer and accept the new calibration.


You can test this spectrometer and check to see if it has improved. Repeat this step on the second spectrometer. Once both spectrometers have a good calibration you can start to look at your samples.

Note: To make sure that both spectrometers are selected for your analysis hold down the “ctrl” button and left click on spectrometer 1 and spectrometer 2 in the Devices menu. If done correctly both spectrometers will be highlighted yellow as seen below.
Make an analysis
Click on point mode to move back to the previous screen where we focused the sample. Move to and focus on the sample you wish to investigate. In Point mode you can either preview a spectrum or acquire a spectrum. When you are focused on a sample you can click “Preview” to see the EDS spectrum in real time. This allows you to make sure you have focused on the sample and will see a spectrum and to see what peaks are there or not. As you work with the instrument and your samples this is a quick way to identify that you are on the right sample. Beside the “Preview” button is a drop-down carrot, this allows you to change your preview settings.


When you are ready you can now acquire a spectrum. Next to the “Acquire” button is another dropdown carrot which allows you to pick your analysis settings. You have a few options in this area, it is important to take your time to make sure you get the most out of your analysis. In this menu you can select your Measuring time either as an automatic or manual acquisition, as a maximum number of X-ray counts, real time, or live time (accounts for the detector dead time) and set the region of interest. You can also select Cyclic acquisition, which is fantastic for samples which may change with time. Spot size can be set to 20 µm or 116 µm, depending on the homogeneity of your sample this should be considered. Automatic analysis will trigger the quantification of your sample based on the loaded Quant file. Finally, you can pre-name your spectrum and insert sample or ID numbers.
Select Peaks
The first step after capturing a spectrum is to identify the peaks in your sample. The simplest way to do this is to use the Auto function in the periodic table as shown below. This will identify and label elements in the spectrum with a good level of accuracy. However, there may be peaks missing or miss-identified, so you should always review and examine your peak listings.
A big tip when doing this is to have some understanding of the possible elements that can be in your sample for example if the sample is from an experiment, then you would know what elements that have been added to the material based off the starting materials that you have used. If you are studying a geological sample then having a copy of known rock and mineral data while examining will always be helpful.
In the Images below we are looking at a powdered geological reference material and all the elements that should be identified have been, except for manganese (Mn). When we magnify and look at the spectrum, we can see that the peak is there and that we have to manually add it to the spectrum list. This is important as the quantification method for µ-XRF is impacted by the correct identification of the characteristic X-ray lines.


Quantify
Finally once all the spectrum peaks have been identified we can start to do a quantification of the spectrum and save or data. In this example we are using the pre-loaded automatic quantification and have not carried out any form of type calibration, therefore our data is semi-quantitative (There will be a separate post about Quant in µ-XRF and how we make type-corrected calibration files. I will add a link to it here when it is posted). Using the default Quant setting will then produce an output file which the user/operator will need to review to determine if it is appropriate to use.


Save Your data
It goes without saying but always save and backup your data. in the M4 GUI you will see the blue grey buttons with the equilibrium symbol on them. You will notice that there are multiple buttons on the screen. Each button is related to the box that it is found in. To save your spectrum you can click the button in the spectrum window and save your data. The same goes for the quant results, the video images, and the project files. Have a look at these and see the various options that you have at your disposal. Finally back up your data to the cloud or a clean HDD or USB.
Shutdown
Once your work is finished for the day remember to leave the instrument in a safe state. Essentially, we are working backwards to how we turned the instrument on. Firstly, switch off the X-ray source by clicking on the yellow X-ray button. Once off click on the eject button this will move the stage to the sample exchange position and vent the chamber. Once vented, click on the door button, and remove your samples and store in a safe place. Close the door and return the system to vacuum. Depending on the laboratory that you work in further shutdown of the system is generally at the discretion of the instrument scientist and how they run their laboratory so have a chat to see what they would like you to do or not do.